|
Colored pencils are an excellent art medium for coloring. Good-quality colored pencils are even better (My favorite is Prismacolor).
You can start with a basic set of 24 colors. That is just plenty to start with.
Next thing - sort the colors. I like to group my pencils by color groups - warm colors, cool colors, neutrals. Having them in groups will make a color selection easier - you will immediately see all available variations. |
Think of a few extras, that you might want to use:
 |
 |
 |
 |
drawing board and masking tape
I find it helpful to tape paper to a drawing board (or any kind of heavy board - illustration board, a piece of cardboard that fits the size, etc.). This way, as you work, the corners will not bend, it will be easier to store the work when you are not working on it, and finally, it will keep it flat and protected. |
dry board eraser
This is the best way to clean the surface of the drawing from eraser or pencil crumbs. |
colorless blender
This pencil has wax but no pigment. Use it to burnish the surface of the paper, filling in all the little white flecks from divots in the paper. This creates a smooth look. Once the paper is burnished, it will be difficult to add layers from other pencils. If you choose to blend with this tool, it should be the last step in your drawing.
|
odorless mineral spirits
Another way to fill these holes, blend pencil strokes, and brighten colors is to dissolve your pencil with odorless mineral spirits. Apply lightly with a Q-tip to spread the color.
When it dries - you can apply more layers of colored pencils on top of it.
You can also try baby oil for a similar effect. Do not overdo it though. |
 |
 |
|
|
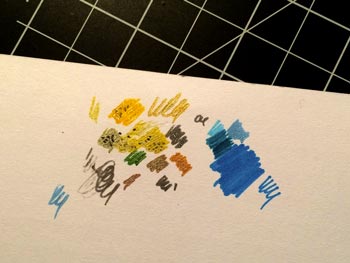
scrap paper
Use to test colors and color combinations, blending techniques, etc. |
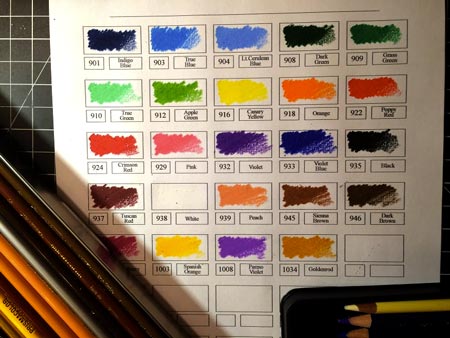
color chart
Make a color chart of your pencils before you start, especially if these are new pencils... |
|
|
|
Practice first
If you are a complete beginner - follow the steps below. Otherwise, move to the next tip.
 |
- Print out the worksheet or use a piece of drawing paper
- Use your colored pencils (Prismacolor or any professional quality soft colored pencils)
- Choose a medium tone colored pencil as your main color for this exercise..
- Follow the steps below
|
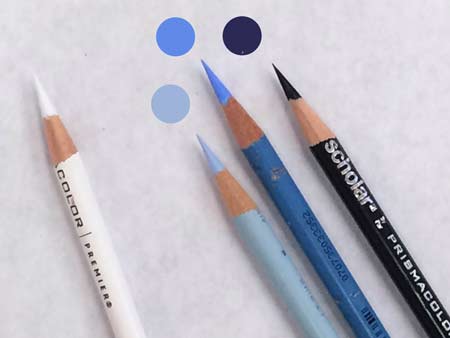 |
Once you chose a main color (medium blue) - you need to find two more pencils:
- lighter tint of your main color (light blue), and
- darker shade of your main color (dark blue)
White pencil is always helpful to lighten areas, blend light colors, fix mistakes, etc.
IMPORTANT:
Sharpen the pencils before work. Continue sharpening them as you work on your assignment.
|
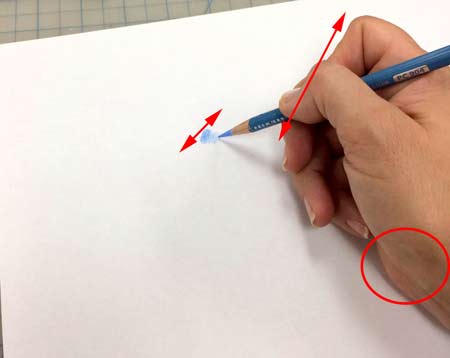 |
Practice shading with small strokes.
Your wrist should rest on the table, don't move it as you shade - move only the pencil - this way your strokes are tight and they are small. Reposition the wrist, then apply a new set of strokes - they can overlap, can be placed at different angles, or you can rotate the worksheet itself - whatever is more comfortable for you.
IMPORTANT:
Strokes should be small - this way it is easier to control you shading.
Try shading while changing the pressure that you apply to your pencil - from full coverage (full strength) to fading.
|
 |

If you move your wrist while shading - the strokes will become longer and sketchy - this is not the result we want for this particular assignment. |
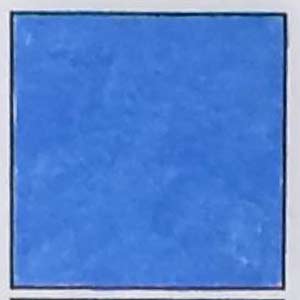 |
1 - solid color shading.
Stay inside the square.
No strokes and none of paper should be visible - solid, full strength coloring with small strokes.
Overlap strokes, make sure they fill in the entire area. |
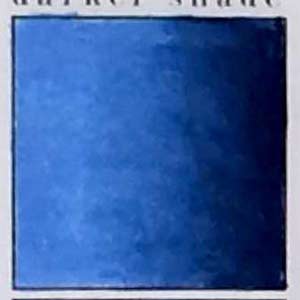 |
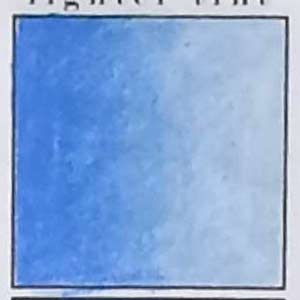
2 - gradation from color to a darker shade
Use two pencils: medium color and the darker shade.
Follow the steps below.
Transition should be smooth, without a define border between the colors.
See the steps below: |
Shade the square with the main color:
Start on the left with the full strength, lightening the pressure towards the middle, then completely fading.
|
|
On the right:
Shade with the dark color - full strength on the right, fading towards the left side.
|

|
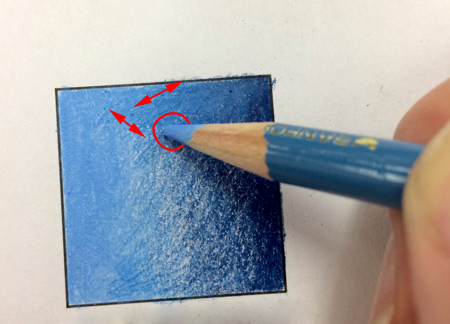
Use the first (main) color for blending.
Use small strokes in all directions, or use circular strokes.
IMPORTANT:
Always use the lighter color for blending.
|
 |
|
 |
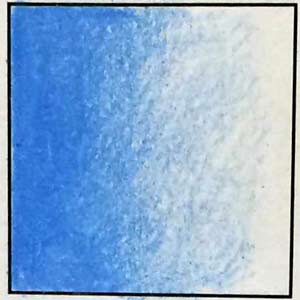
3 - gradation from color to a lighter tint
Repeat the steps above with the main color and the lighter color.
Use the lighter color for blending. |
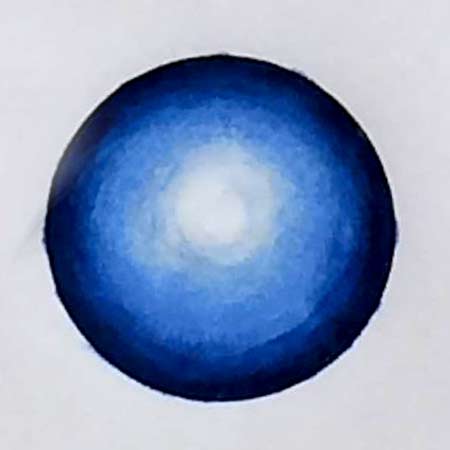 |
4 - dark to medium to light
Create a 3-D shading (coloring) using all three pencils (main color + dark + light).
You can use WHITE pencil in the center for blending.
Strokes should follow the form. |
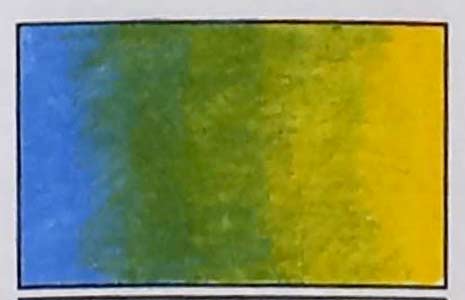 |
5 - two-color gradation
Create a smooth transition from one color to another.
Remember to use the lighter color for mixing and blending. |
Four-step basic 3-D shading
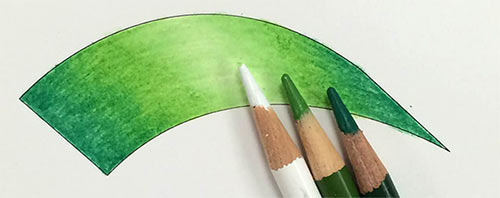 |
Pick a dominant color - in this case it's medium green.
Prepare at least 3 pencils: WHITE, MEDIUM GREEN, and DARK GREEN. If you chose a different dominant color - use the formula:
|
| White + Dominant color + Darker version of the main color |
 |
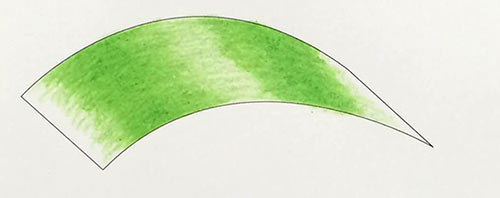
step 1
Start with a Medium Green. Shade lightly most of the surface. |
 |
step 2
Go over with the same Medium Green pencil and color more intensely, leaving the middle as is. |
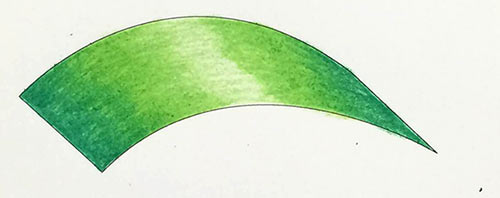 |
step 3
Use Dark Green and color in the sides of the shape, use Medium Green again to blend the two colors. Always use the lighter colors of the to for blending. |
 |
step 4
Use White pencil to blend the middle part - the lightest area. |
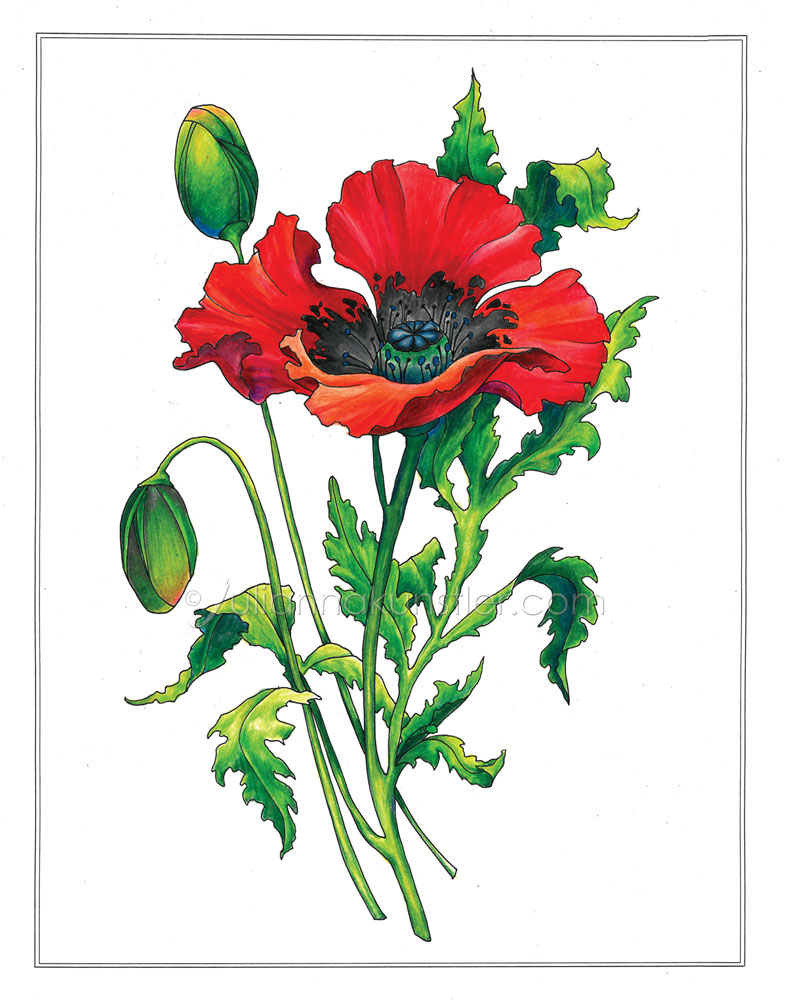
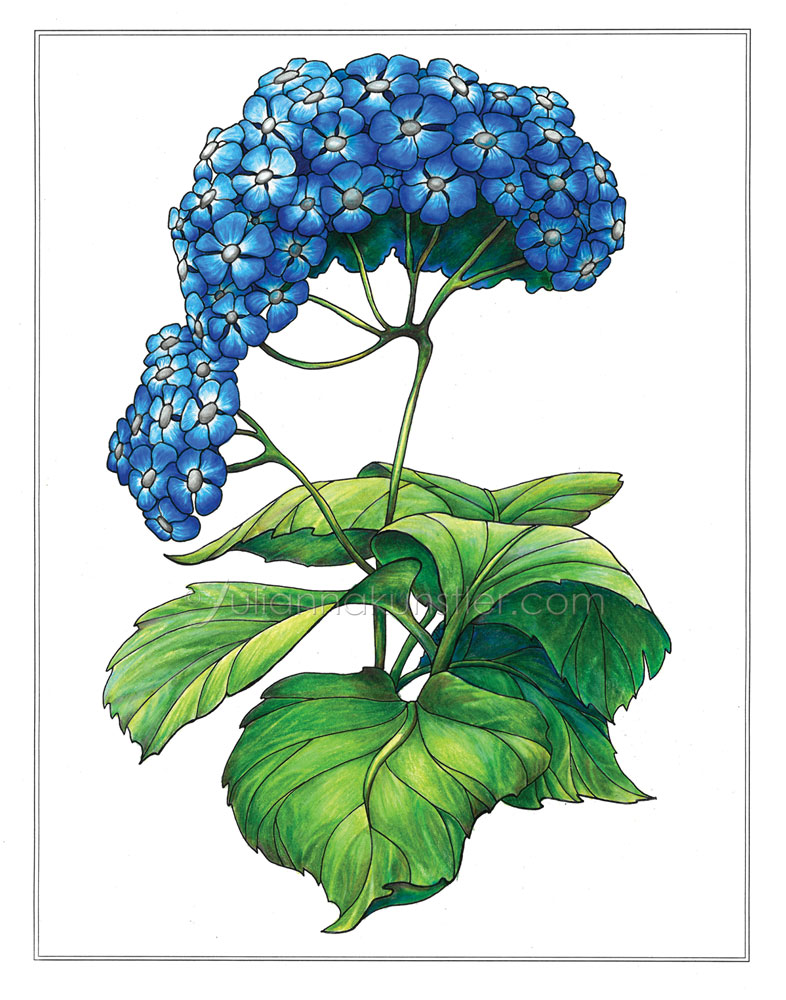
examples
click to enlarge
|
|
|